

Docker for development on Mac M1#
Most of these instructions are valid for any docker based development, but the M1 has a couple of special requirements.
Install and setup Docker#
Install docker by e..g downloading the install from the docker website
Once you have docker desktop running open the settings (Cmd ,)
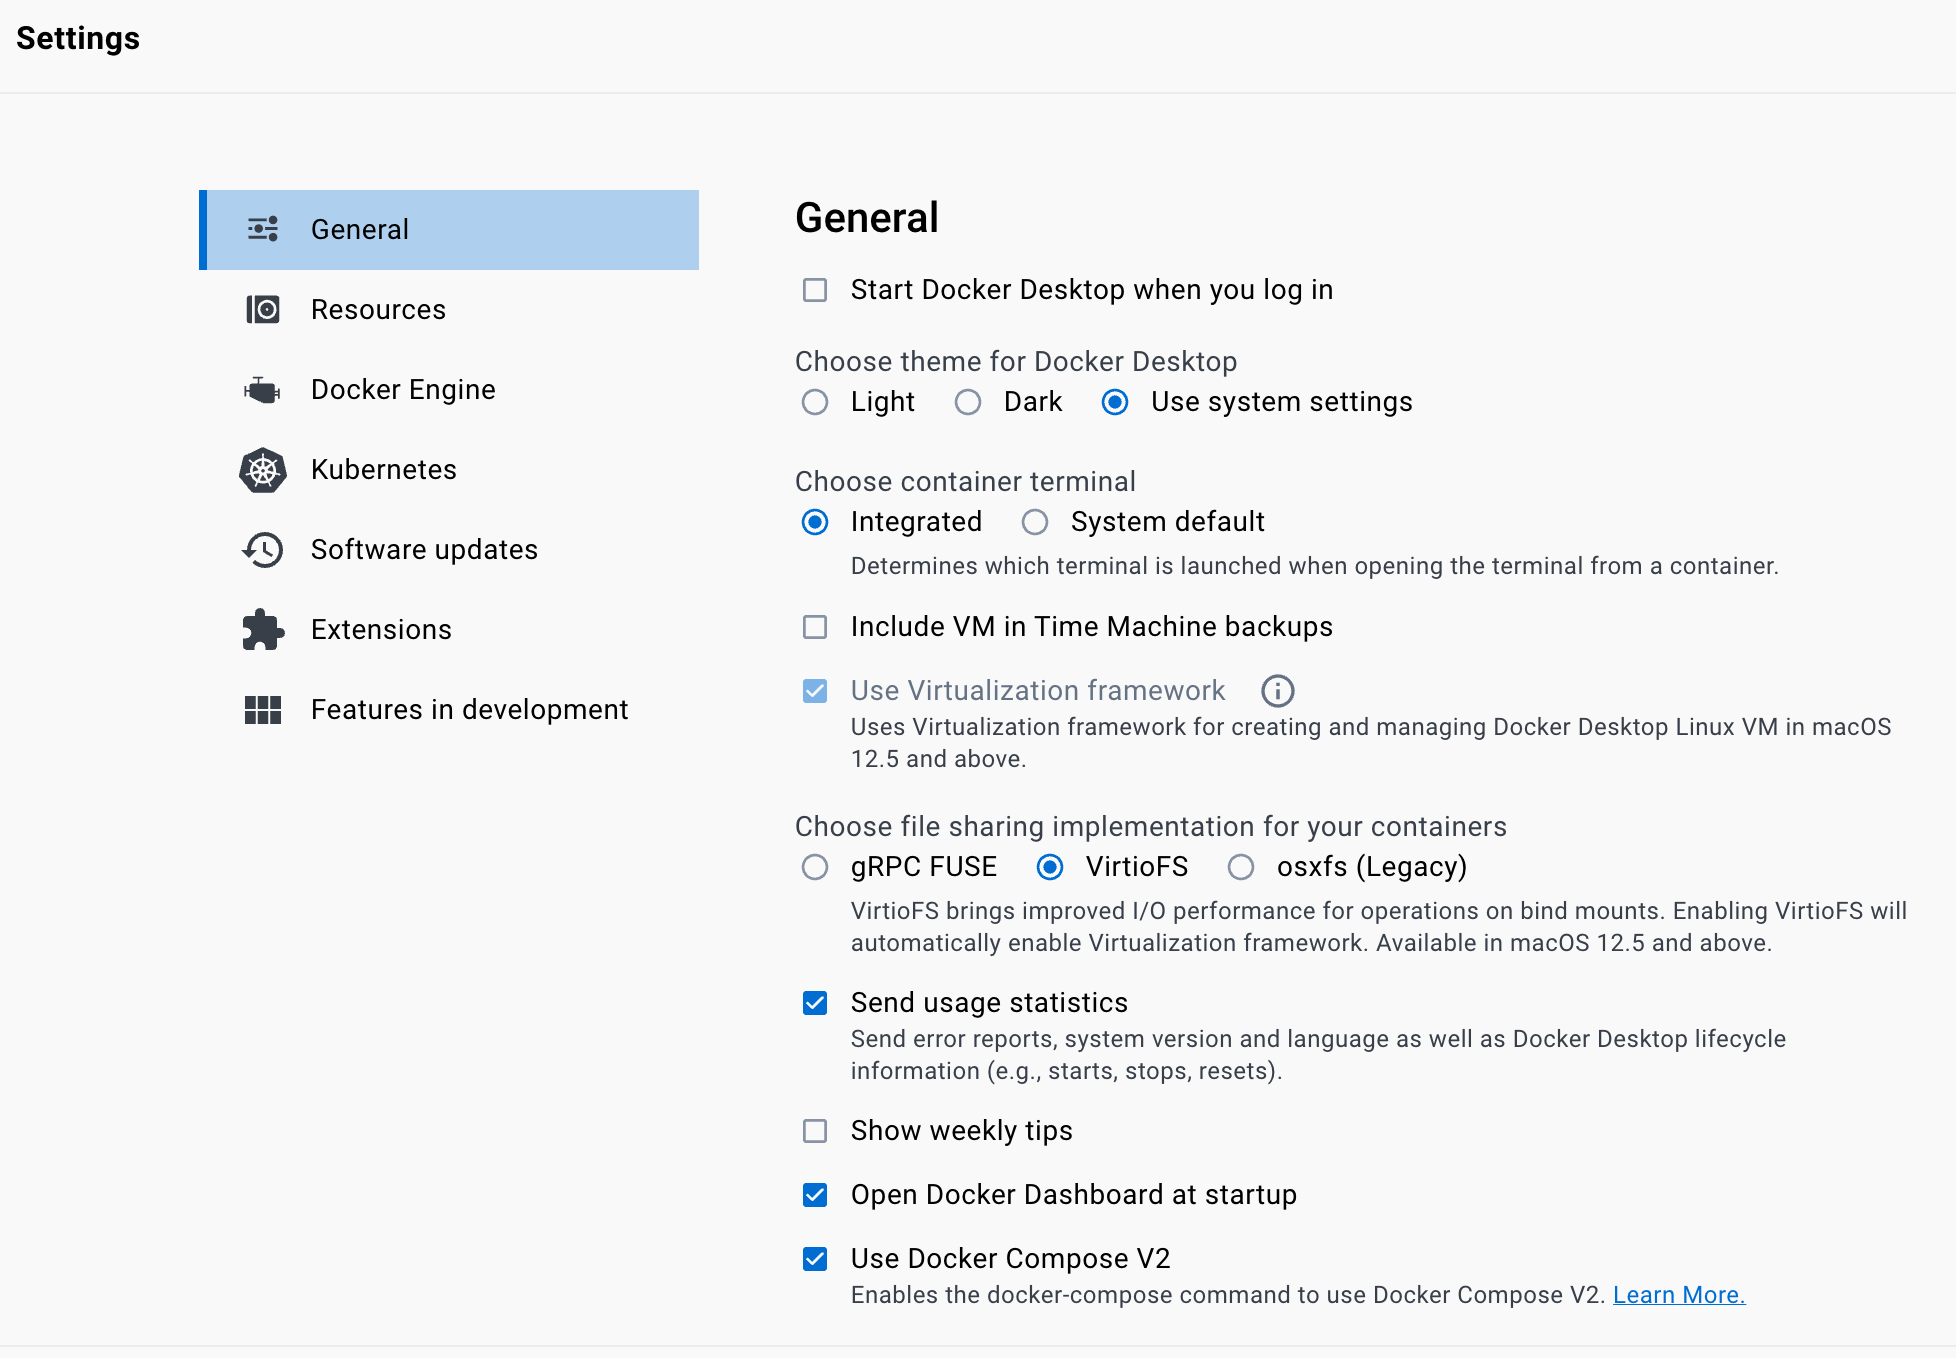
In the General settings make sure ‘VirtioFS’ is selected.
In the Features in Development settings select ‘Use Rosetta for X86/amd64 emulation on Apple Silicon’

Running the container#
The develop tag indicates the most recent container that should be used for development.
The development container is develop-env.
On Mac M1 to avoid a warning add --platform linux/amd64.
Naming the container is useful for logging in and finding it later.
The ‘-v’ option may be used to mount a local directory into the container - keeping all you checkouts in a folder outside is useful if you want to use an IDE for editing.
So a command to spin up a container and put you on the command prompt would look like (with output) :
$ docker run --platform linux/amd64 --privileged --name sal --rm  -v ${HOME}/LSSTcode/TSS:/home/saluser/develop -it lsstts/develop-env:develop
LSST_SDK_INSTALL /home/saluser/repos/ts_sal
Using DDS QOS from /home/saluser/repos/ts_sal/../ts_ddsconfig/python/lsst/ts/ddsconfig/data/qos/QoS.xml
SAL development environment is configured
<<< Vortex OpenSplice HDE Release 6.9.190925OSS For x86_64.linux-debug, Date 2022-02-08 >>>
~/repos/ts_sal ~
~
LSST middleware toolset environment v7.2.0-4-g2e9da550 is configured.
LSST_SDK_INSTALL=/home/saluser/repos/ts_sal
OSPL_HOME=/opt/OpenSpliceDDS/V6.9.0/HDE/x86_64.linux
[saluser@4f8cd5447d04 ~]$
From there you are ready to conda install or setup up any packages you need.